EXPORT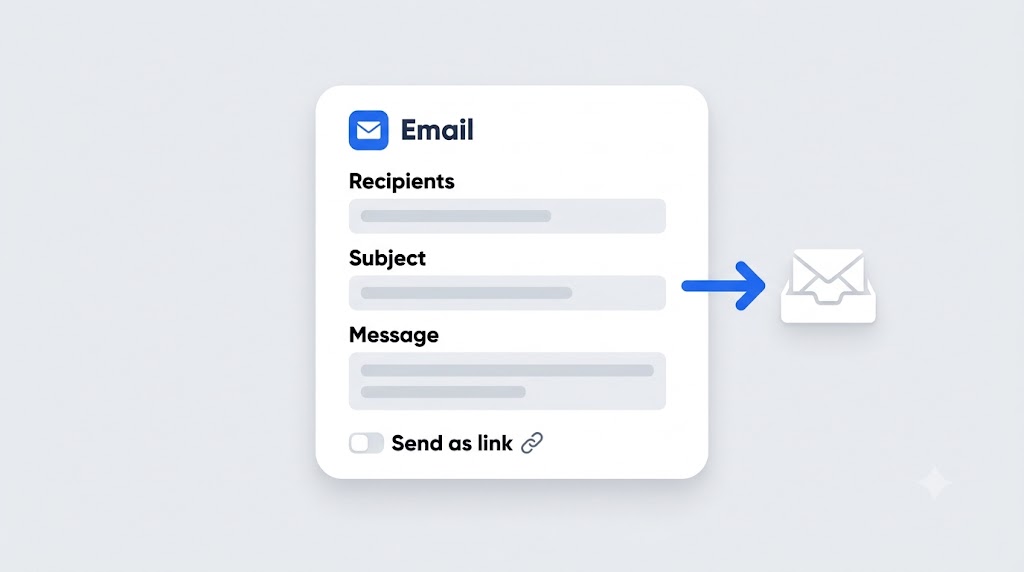
Shopify can technically email you an order file, but only as a side effect of a manual export, and only to you and the store owner. If what you actually want is a report that lands in your warehouse team's inbox every morning, or your accountant's inbox every Monday, or a supplier's inbox every night, Shopify's own tools stop short. Export OrderPro's Automations feature closes that gap: pick a report, pick a schedule, choose Email as the destination, and the file arrives on its own from then on. This guide walks through the Email destination specifically: recipients, subject lines, message text, attachment versus link, and what to check when an email doesn't show up.
Key Takeaways
- Shopify's built-in export only emails a CSV when you manually export more than 51 orders, and only to you and the store owner.
- Export OrderPro's Email destination sends to any recipient list, on a recurring schedule, with a custom subject and message.
- "Send report as link" is a manual toggle, not an automatic switch based on file size.
- Recipients are a single free-text field with no built-in cap, so double-check addresses with the Test button before trusting them.
Why Shopify's built-in export can't do this
Shopify's own order export only emails a file as a one-time side effect of a manual export: "If you select to export more than 51 orders or to export orders by date, then the CSV file is emailed to you and the store owner." That's it. There's no recipient list beyond the store owner, no way to add a supplier or a warehouse alias, and no way to make it repeat. Every export is a one-off, triggered by hand, delivered to the same two people every time.
That's a platform limitation, not a hidden setting you missed. For the full side-by-side on what Shopify's export can and can't do compared to a dedicated app, see Shopify's Built-In Order Export vs. Export OrderPro. What follows is how to actually automate the email you're looking for.
1. Build the report and, optionally, a filter first
An email automation needs two things underneath it: a report design, which controls which columns appear, and optionally a filter, which controls which orders are included. If you haven't set either up yet, do that first in Manager → Report Designer and Manager → Filter Editor. Getting Started with Export OrderPro walks through both from scratch.
Filters matter more here than they might seem to at first. A daily fulfillment email only makes sense if it's filtered to unfulfilled, paid orders. A supplier feed only makes sense filtered to that supplier's vendor tag. Shopify Order Filters Explained covers the operators (!, *, !*) that make vendor, SKU, and tag filtering possible without touching a spreadsheet afterward.
2. Create the automation and choose Email as the destination
Go to Automation in the sidebar, click New Automation, and give it a name specific enough to recognize later, something like Daily Fulfillment Email rather than Automation 1. Select the report design and, if you built one, the filter. Set the schedule frequency and date window; How to Schedule Automated Order Reports covers frequency options and the relative date-window logic in full, so this guide won't repeat it.
Under delivery, there are four destinations to choose from: Email, FTP, Webhook, and Public URL. Select Email. Everything from here on is specific to that choice.
3. Set the sender, recipients, subject, and message
The Email destination has its own small form: a sender name, a sender or reply-to address, a recipients field, a subject line, and an optional message body. None of these come pre-filled. Subject and message both start blank, so write something a recipient will actually recognize at a glance, "Daily Fulfillment List, {date}" beats leaving the subject empty or generic.
Recipients go in one field, separated by a semicolon or comma if you're sending to more than one address. There's no fixed maximum count enforced in the interface, and there's no format validation on the addresses either. Type a typo into an email address and nothing will flag it at save time.
That's worth knowing before you rely on this for something time-sensitive. After setting up a new recipient, use the automation's Test button to trigger an immediate run and confirm the email actually lands where you expect. If you need entirely different data for different recipients, for example a supplier who should only see their own vendor's orders, build a separate automation with its own filter rather than stacking unrelated audiences into one recipients field.
Worth knowing: because the recipients field has no address validation, a mistyped email won't surface as an error when you save the automation. It'll surface days later as "why didn't this arrive," which is a worse time to find out. Run Test once after adding any new address.
4. Choose attachment or a download link
Every email automation has a "send report as link" checkbox. Leave it unchecked and the report file arrives as a direct attachment. Check it and the email instead contains a link to download the file. This is a manual setting you choose once when building the automation, not something that adjusts itself based on how big the file happens to be that week.
That's a meaningful contrast with Shopify's own behavior, where the platform automatically switches from a direct download to an emailed link once you cross 50 orders. Export OrderPro doesn't do that switching for you: if your export is likely to grow past what a recipient's email provider will accept as an attachment, whether that's a corporate spam filter or a personal inbox's size cap, choose the link option up front rather than assuming it'll adapt on its own later.
Attachments are the simpler default for small, stable exports going to a handful of people. Links are the safer choice for larger files, recipients behind strict attachment filters, or exports whose size will grow as your order volume does.
5. Common email automation patterns
A few starting points, all deliverable through the same Email destination:
| Automation | Recipient | Schedule | Format |
|---|---|---|---|
| Daily fulfillment list | Warehouse team alias | Daily, Yesterday | CSV attachment |
| Weekly revenue summary | Accountant | Monday, Previous week | Excel attachment |
| Monthly customer export | Marketing/CRM inbox | 1st of month, Previous month | CSV, link |
| Daily supplier feed | Supplier's email, filtered by vendor | Daily, Yesterday | CSV attachment |
Each row is its own automation with its own filter, not one automation trying to serve every audience at once.
6. What to check when an email report doesn't arrive
Start with the automation's History tab. It records every run regardless of destination, including the exact time it fired, the date window applied, how many orders matched, and whether delivery succeeded. If a run shows as skipped, the most likely reason is that no orders matched the filter and date window, which the app records rather than silently sending an empty file (unless you've enabled the "export even with no orders" option).
If the History tab shows the run as sent but the recipient still says nothing arrived, there's no bounce-specific messaging surfaced today. What does exist is a consecutive-failure safeguard: after five consecutive failed runs, the automation pauses itself and shows a general error rather than continuing to fail silently. A single missed email, though, won't necessarily trigger that pause or produce a specific "this address is invalid" message. In that situation, verify the address directly and check spam or quarantine folders before assuming the automation itself is broken. The Test button remains the fastest way to isolate whether the problem is the address, the recipient's filtering, or the automation's configuration.
Frequently asked questions
Can Shopify send me order reports by email automatically, without an app?
No. Shopify's own export only emails a file as a one-time side effect of manually exporting more than 51 orders, and only to you and the store owner. There's no scheduling and no custom recipient list built into the platform itself.
How many people can receive an automated order report email?
The recipients field accepts multiple addresses separated by a semicolon or comma, with no fixed cap in the interface. For audiences that need genuinely different data, like a supplier who should only see their own orders, use a separate automation with its own filter rather than one long shared list.
Does the report arrive as an attachment or a link?
Either, depending on the "send report as link" checkbox. It's a manual setting you choose when building the automation, not an automatic switch based on file size.
What happens if I type a recipient's email address wrong?
Nothing will flag it at save time, since there's no address-format validation in the field. Use the Test button after setup to confirm delivery, and check the History tab if a recipient later reports nothing arriving.
Can I write a custom subject line and message?
Yes. Both fields start blank with no default text, so set a subject and optional message that identifies the report, for example the team it's for or the date range it covers.
Can I trigger an email report outside its normal schedule?
Yes. Every automation has a Test button that sends an immediate run using the automation's current settings and its last date window, which is the fastest way to confirm a new recipient or configuration before the next scheduled fire.
Next steps
With an email automation running, the next thing worth refining is exactly which orders make it into that email. See Shopify Order Filters Explained for vendor, tag, and SKU-based filtering, or How to Schedule Automated Order Reports for the full schedule and date-window reference if you're setting up automations for FTP, webhook, or public URL destinations too.